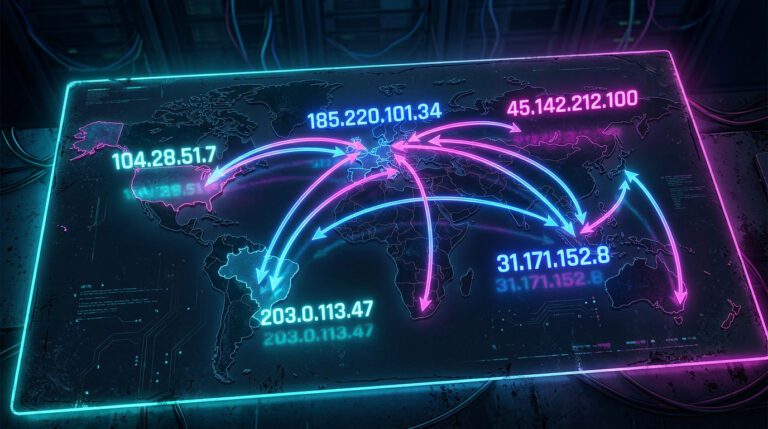
DNS is like an Internet phone book: you type “google.com “, and the system translates this into an IP address. The problem is that sometimes these requests don’t go where they should. You seem to be sitting under a VPN, the traffic is encrypted, the IP address is spoofed – but DNS queries continue to leak to your provider. This is called DNS leak.
Why is this a bad thing? First, your Internet service provider (or anyone who controls the network) sees which sites you visit. Secondly, this data can be used for advertising, censorship, and sometimes even for surveillance. Thirdly, DNS queries are easy to substitute: you may not be sent to the real bank’s website, but to a phishing copy.
Therefore, the question of how to prevent DNS leaks is not a paranoid whim, but a basic element of digital hygiene. If you want the VPN to work as promised, you need to check and configure DNS.
Understanding How DNS Leaks Happen
Before solving a problem, you need to understand its causes. DNS leaks appear most often due to errors in settings or operating system features.
- VPN configuration errors. Not all VPN clients are the same: some have DNS leak protection, while others do not. Sometimes a VPN connects an encrypted tunnel for traffic, but DNS still “goes” directly to the provider.
- The behavior of the OS and applications. Windows, macOS, Android, and even individual programs can use their own DNS settings. For example, an application can ignore the VPN and send requests directly.
- WebRTC and split-tunneling. Browsers can “rent out” your real IP address via WebRTC. And split-tunneling can route some requests past the VPN.
- Public Wi-Fi. Local DNS servers are often imposed in hotels, cafes, and airports. Even if you have a VPN, they can intercept requests.
If you want to know more about DNS Leaks and its definition feel free to check our special article.
Understanding how leaks appear is half the answer to the question of how to prevent DNS leaks. Without this, you can check every day, but you don’t understand why the problem occurs over and over again.
How to Prevent DNS Leaks with a Trusted VPN
The very first step in solving the problem is obvious: use a reliable VPN. Not all services are the same, and not all are able to protect against DNS leaks.
- DNS leak protection. Good VPN clients enable this feature by default: they redirect all DNS requests through an encrypted tunnel. This ensures that the provider will not see your requests.
- Own DNS servers. The best VPN providers use their own DNS, not public ones. This means that your requests are processed inside a secure network.
- Check before purchase. Don’t take marketing at its word. Any VPN can be tested: connect → log in to dnsleaktest.com → you’re looking at whose DNS is visible. If your ISP is there, run away from this service.
Choosing the right VPN is half the success. Without it, the other methods will work intermittently. If you’re seriously thinking about how to prevent DNS leaks, start right here: with a reliable and trusted provider.
Configuring DNS Settings Manually
Sometimes the best way to take control of a situation is to set things up yourself. When you rely on “automatically assigned DNS”, the system most often takes them from your ISP. And this is exactly what causes DNS leaks.
What can be done:
- Assign public DNS. The most popular options are Google (8.8.8.8 and 8.8.4.4), Cloudflare (1.1.1.1 and 1.0.0.1), Quad9 (9.9.9.9). They are faster, more reliable and do not “shine” your requests to the provider.
- Delete the DNS provider. In the network settings, you can manually remove the ISP’s DNS servers and replace them with the selected public ones. It works on Windows, macOS, and Linux.
- When manual setting is better than automatic setting. If you have a VPN without built-in protection or an unstable router, manually setting the DNS gives you more confidence that the requests will go where you decided.
This is not a silver bullet, but it is one of the practical ways to prevent DNS leaks, especially if you want to control everything yourself.
Browser Settings and How to Prevent DNS Leaks Online
Even if your network is set up perfectly, the browser can play against you. The main culprit is WebRTC. This technology is needed for calls and videos directly in the browser (for example, in Zoom or Google Meet), but it has a side effect: it can reveal your real IP and bypass the VPN.
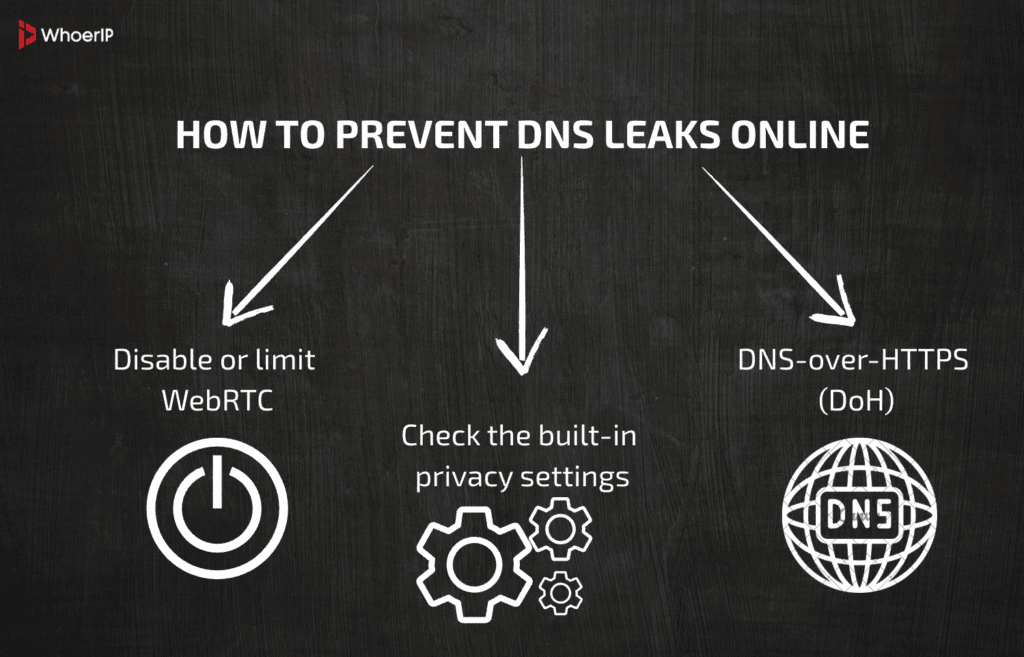
If you are interested in how to prevent DNS leaks when working on the Internet, browser settings are the second level of protection that cannot be ignored.
Using DNS over HTTPS (DoH) and DNS over TLS (DoT)
One of the most technologically advanced ways to protect DNS queries is to encrypt them. To do this, they came up with DNS over HTTPS (DoH) and DNS over TLS (DoT).
Instead of sending requests in plain text, the browser or system wraps them in an encrypted connection, either via HTTPS or TLS. To an observer, the request looks like normal secure traffic.
- Advantages.
- Protection against spoofing: a provider or an attacker will not be able to give you a fake website.
- Fixing leaks: your DNS queries are not visible to third parties.
- Compatible with most public DNS (Cloudflare, Google).
- Disadvantages.
- Additional connection load — sometimes slower.
- Not all devices and networks support DoH/DoT.
- Corporate networks may have conflicts with security policies.
Whether to use DoH/DoT depends on your scenario. But if the question is an edge: how to prevent DNS leaks is one of the most reliable methods for personal use.
How Firewalls and Router Settings Help Prevent DNS Leaks
Usually people think about VPN and browser, but forget about the base router and firewall. But it is here that you can put a strong “lock” that physically prevents DNS requests from leaking.
- Blocking DNS queries at the router level. Imagine that your router is the doorman at the entrance. If it is configured correctly, it will not skip a single DNS query past the VPN. This is done simply: all accesses to ports 53 (DNS) and 853 (DoT) are blocked, except for those that go through your VPN.
- Firewall configuration. A local firewall can perform the same function. It only allows VPN traffic, and any attempts by the application to “bypass” the tunnel are blocked. This is especially useful if you frequently use public Wi-Fi.
- Control of the entire local network. DNS leaks may appear not even on your device, but on your router. If it uses the default DNS provider, then the entire network “passes” its requests. Therefore, it is important to check and update not only the computer, but also the network equipment.
As a result, the firewall and router are your “line of defense”, which ensures that even if the application behaves incorrectly, the DNS will not get past the VPN.
Checking for DNS Leaks Regularly
You can set up a VPN, DoH, and firewall, but without regular checks, all this makes no sense. Why? Because systems are being updated, applications are changing settings, and the leak may reappear.
- Online services. The easiest way to check is to log in to dnsleaktest.com or browserleaks.com . The first one will show basic and extended information, the second one will also show WebRTC requests.
- Comparison of IP addresses. Your external IP (for example, via whatismyip.com ) must match the geolocation of the DNS servers that the test shows. If the VPN is in the Netherlands and the DNS is with a Russian provider, then there is a leak.
- When to test. After system updates, changing the VPN client, connecting to a new Wi-Fi, or even just once a month. It’s a simple habit that takes five minutes, but can save you a lot of trouble.
Regular verification is the final touch in the how to prevent DNS leaks scheme. Without it, you live with the illusion of protection, but not with its fact. For more detailed information you can check our article of how to check DNS Leak easily.
| Step | Action | Tool/Method | Goal |
|---|---|---|---|
| 1 | Connect to VPN or network | VPN client | Define environment for testing |
| 2 | Run basic DNS leak test | dnsleaktest.com | See current DNS resolvers |
| 3 | Run extended DNS leak test | dnsleaktest.com (Extended) | Check for hidden or extra DNS servers |
| 4 | Cross-check results | browserleaks.com/dns | Confirm no WebRTC or alternative leaks |
| 5 | Compare IP and DNS server IP | whatismyip.com + test tool | Verify DNS matches VPN, not ISP |
| 6 | Repeat after updates or changes | Manual schedule (monthly) | Maintain privacy and catch new misconfigurations |
How to Prevent DNS Leaks on Mobile Devices
Many people think that DNS leaks are just about computers. But smartphones and tablets are no less susceptible to them, especially on public networks.
- Android and iOS features. On Android, apps sometimes use their own DNS settings, ignoring the VPN. On iOS, leaks can appear via Wi-Fi in hotels or cafes, where the network slips its resolvers.
- Applications with protection. Many mobile VPNs have a built-in DNS leak protection feature. This is one of the selection criteria: always check if the client has such a setting.
- Encrypted mobile DNS. Android 9+ supports Private DNS (DoT), and iOS supports DNS—over-HTTPS via third-party profiles. This means that even without a VPN, your DNS queries will be encrypted.
If the question is how to prevent DNS leaks on your phone, you need to combine two approaches: enabled VPN with protection and using DoH/DoT. This provides almost the same level of security as on a desktop.
Final Checklist: Best Practices for DNS Leak Prevention
When it comes to how to prevent DNS leaks, it’s important not to get lost in the details. Here is a short but succinct checklist that you can keep handy:
- VPN with DNS leak protection. Always start with a reliable provider that has its own DNS servers. This is the basic level of protection.
- DoH/DoT for encryption. If there is no VPN or it is turned off, use DNS-over-HTTPS or DNS-over-TLS. This saves you from substitution and censorship.
- Firewall and router. Set up filtering: block all DNS queries that do not go through the VPN. This creates a “hard corridor” for traffic.
- Manual DNS configuration. Replace the provider’s servers with Cloudflare, Google, or Quad9. It is especially useful if the router “stubbornly” slips its own.
- Browser. Disable or restrict WebRTC, enable DoH, check the Privacy section & Security.
- Mobile devices. Enable Private DNS on Android, and DoH profile on iOS. In conjunction with a VPN, this is almost 100% protection.
- Regular checks. After updates, network change, or VPN always check the connection on dnsleaktest.com or browserleaks.com.
| Method | When to Use | Why It Helps |
|---|---|---|
| VPN with DNS Leak Protection | Always, as the first line of defense | Ensures DNS queries go through encrypted tunnel |
| DNS over HTTPS (DoH) | Without VPN or in browsers supporting DoH | Encrypts DNS, hides queries from ISP |
| DNS over TLS (DoT) | On mobile or OS-level configuration | Provides secure channel for DNS traffic |
| Firewall Rules | On personal PC or corporate networks | Blocks all non-VPN DNS traffic |
| Manual DNS Settings | When ISP DNS is forced | Use trusted resolvers like Cloudflare or Google |
| Browser Settings | Daily browsing, especially WebRTC-heavy apps | Stops IP leaks, improves privacy |
| Mobile DNS Settings | On Android/iOS devices | Adds extra layer of protection outside VPN |
If you get into the habit of doing this, DNS leaks will no longer be a problem. The main thing is not to configure it once, but to check and update the protection as an element of digital hygiene.
How to Prevent DNS Leaks Conclusion
DNS queries are tiny lines that can tell you more about yourself than you think. Even if all traffic is encrypted, they reveal the list of sites, the time of your visit, and sometimes your real IP address. Therefore, DNS leak protection is not a whim, but a basic level of security.
By understanding how to prevent DNS leaks, you learn to control your digital environment: set up a VPN correctly, use encrypted DNS, and manage your router and browser. It doesn’t take much time, but it drastically reduces the risks of surveillance, censorship, and phishing.
Today, checking and protecting DNS queries is becoming as much a habit as updating a password or turning on an antivirus. This is a simple rule that helps to maintain privacy and tranquility in a world where your digital footprint is valued no less than real data.
Frequently Asked Questions
How to test DNS leak?
Use online tools like dnsleaktest.com or browserleaks.com to see which DNS servers are queried.
How to protect from DNS leak?
Use a VPN with DNS leak protection, configure trusted DNS servers, or enable DoH/DoT.
How to mitigate DNS leak?
Block non-VPN DNS traffic with firewall rules, disable WebRTC in browsers, and set manual DNS settings.
What is DNS leak protection?
A VPN feature that forces all DNS queries through the encrypted tunnel so your ISP can’t see them.
What is DNS leak test?
A check that shows whether your DNS requests are going through your VPN or leaking to your ISP.
How to check DNS leak?
Connect to VPN → run dnsleaktest.com → compare DNS servers with your VPN provider.