One task many seem to overlook when it comes to taking protective measures for their online privacy is the IP blacklist check.
An IP address, the unique identifier for your device on the internet, can become flagged or blacklisted for various reasons, potentially causing headaches like email deliverability issues, website access problems, and even security risks. Regularly checking whether your IP is on a blacklist can save you from unnecessary disruptions and help keep your online presence secure.
But why exactly should you be doing an IP blacklist check? And how do you go about it? In this article, we’ll explore the importance of checking your IP status, how blacklisting occurs, and why proactive monitoring is key to maintaining smooth and secure operations online.
What is an IP Blacklist?
Before we dive into why an IP blacklist check is essential, let’s first understand what an IP blacklist actually is. An IP blacklist is a list of IP addresses identified as sources of spam, malicious activity, or other suspicious behavior. These lists are used by various services and websites to block access or prevent communication from bad actors. Today is quite simple to block an IP address so it is important to keep a track of it regularly.
For example, if your IP address is blacklisted, it could result in issues like:
- Email deliverability problems: Emails sent from your IP may end up in recipients’ spam or junk folders.
- Website access issues: Certain websites or services might block or limit access from blacklisted IPs.
- Reputation damage: Being associated with a blacklisted IP can damage your reputation, whether you’re an individual, a business, or a service provider.
There are multiple reasons an IP address might be blacklisted:
- Sending spam or unsolicited emails
- Hosting malicious content or running malware
- Being involved in suspicious online activities
- Having an infected or compromised device (botnet activity)
IP blacklisting can affect both individuals and organizations. That’s why it’s important to perform regular IP blacklist checks to ensure you’re not unknowingly on a blacklist harming your online reputation.
Reasons Why You May Need IP Address Blacklist Check
When you encounter that emails do not reach their recipients or websites suddenly restrict access, often the reason lies not in “Internet glitches”, but in the fact that your address has been blacklisted. Such blacklists are created to combat spam, viruses, and suspicious traffic. Therefore, IP blacklist check or IP address blacklist check becomes an important step in diagnosing network problems. It helps you understand if the problem is on your side or if the blocking is coming from providers and services. Below are the key reasons why you should check the IP blacklist regularly.
- Spamming and mass Email campaigns. If a lot of unconfirmed emails are sent from the IP, mail services (Gmail, Outlook, etc.) quickly blacklist the address. Common reasons: purchased mailing lists, lack of confirmed opt-in, lack of SPF/DKIM/DMARC. Before making an ip address blacklist check, check your mail server settings.
- Open mail relays and incorrect SMTP configuration. A server that allows you to forward mail to any address without authentication is a gold mine for spammers. Even if you didn’t send spam, an open relay is the reason for being blacklisted. The solution is to close relay and set up authentication.
- Malware and infected devices on the network. Computers or IoT devices with a botnet can generate spam, scan ports, or participate in DDoS attacks. Even one infected client router on your network can pollute the overall IP range. Do regular antivirus scans and isolate suspicious gadgets.
- Proxy/VPN/TOR exit node or public proxy. The IP, which is used as an exit node for anonymization (VPN, TOR), often gets into the lists — mailers and websites see many different users from the same address. Therefore, when checking the ip blacklist, such addresses are often “red”.
- Aggressive parsing, scanning and brute force. If there is an active port scan from the IP, frequent login attempts (brute force), site parsing without pauses, sites and hosting services complain, and the provider receives a report. This is the reason for the blacklist ip check and further actions.
- NAT neighbors/shared IP (shared hosting, CGNAT). If you have a dynamic or shared external address, you “share” your reputation with other users. One “evil neighbor” can put everyone away. Check if your server is in the provider’s shared pool, and if there are problems, ask them to change/allocate a static IP.
- An old/oversold IP with a bad history. By buying a server or renting a login from a new provider, you can get the IP that you previously used for bad things. Before hosting, it makes sense to do an ip blacklist check on several databases.
- User complaints and service moderation. Constant complaints about behavior from your IP (flood, insults, fraud) lead to manual blocks. This is especially true for gaming, forums, and social media.
- DNS PTR/Reverse record mismatch. Mail services check the PTR (reverse DNS). The lack of a correct PTR or mismatch with a hostname is a common reason for getting into email blacklists. The provider can correct the PTR at your request.
- Geopolitical and regulatory blockages. Sometimes blockages are imposed entirely on regions (for example, sanctions, state censorship). In this case, the check ip blacklist will show that the reason is not individual complaints, but policy.
- Erroneous/false reports and cross-lists. Sometimes data gets into aggregated lists by mistake, for example, due to bugs in automatic filters. A regular ip address blacklist check across multiple databases helps identify false occurrences.
What to do after you have discovered the problem (briefly)
- Perform a blacklist ip check on several popular databases (DNSBL, Spamhaus, etc.).
- If the reason is email: check SPF/DKIM/DMARC, close open relay, reduce mailing lists.
- If the cause is malware: isolate the device, perform scans and updates.
- For shared/leased IP, contact your provider: ask for a change of IP or static allocation.
- For erroneous blocks, follow the delist procedures on blacklist sites (usually there is a form or instruction).
- Document everything.: screenshots, logs, and time — these help with appeals.
How to prevent being blacklisted (quickly)
- Configure SPF/DKIM/DMARC for mail domains.
- Update and scan your devices regularly.
- Avoid using public proxies and TOR to send mail.
- Monitor the reverse DNS Record (PTR).
- Monitor IP reputation: do ip blacklist check periodically, without waiting for problems.
| Reason for Blacklist | Description | Quick Solution |
|---|---|---|
| Spam or Mass Emailing | Too many unsolicited emails, lack of SPF/DKIM/DMARC | Configure mail authentication, reduce spam-like behavior |
| Open Mail Relays (SMTP misconfig) | Server allows unauthorized mail forwarding | Close relay, require authentication |
| Malware or Botnet Activity | Infected devices sending spam/DDoS | Scan and clean devices, update software |
| VPN/Proxy/TOR Exit Node | Shared IP used by many anonymous users | Switch IP, avoid sending critical traffic via public proxies |
| Aggressive Crawling or Brute Force | Excessive login attempts, port scans | Limit requests, use rate-limiting, secure devices |
| Shared NAT or Hosting IP | Reputation shared across many users | Request dedicated/static IP from provider |
| “Dirty” Old IP Address | Previously abused IP assigned to you | Run IP blacklist check, request new IP from ISP |
| User Complaints or Abuse Reports | Reports of fraud, spam, offensive content | Follow community rules, appeal false reports |
| Missing or Wrong PTR (Reverse DNS) | Email server reverse DNS doesn’t match | Fix PTR with provider, align DNS with hostname |
| Regional/Political Blocks | Entire ranges blocked due to sanctions or censorship | Use official channels, consider legal VPN (if allowed) |
| False Positives in Blacklist Databases | Automatic filters flagged your IP wrongly | Submit delisting request with supporting evidence |
To summarize: the reasons for being blacklisted are usually specific and solvable — spam, infected devices, open relays, shared IP or regulatory restrictions. Regular ip blacklist check and basic digital hygiene can significantly reduce the risk and speed up the restoration of your reputation if you do end up on the list. If you want, I can send you a short checklist “5 steps after blacklist detection”, which is convenient to store and apply.
Why You Should Do an IP Blacklist Check Regularly
You might be wondering, “Why do I need to check if my IP is blacklisted?” After all, it’s not something that happens frequently, right? The truth is, many online services rely on blacklists to filter out spam and malicious content, so even minor incidents involving your IP address could have significant consequences.
Here are some key reasons to make IP blacklist checks a regular part of your online routine:
1. Protect Your Email Reputation
One of the most common reasons for an IP to be blacklisted is sending out spam or bulk emails. If you run email marketing campaigns or even just send a lot of personal emails, you may unknowingly trigger spam filters, especially if your email content or frequency resembles spamming behavior.
A blacklisted IP address can cause your emails to be flagged as spam, reducing your email deliverability and damaging your sender reputation. This can result in:
- Emails being marked as junk or spam.
- Legitimate emails not reaching recipients.
- Difficulty engaging with clients or customers via email.
Regular IP blacklist checks can help you spot and resolve any issues before they escalate into a bigger problem. By ensuring your IP remains off blacklists, you maintain control over your communication channels and protect your professional reputation.
2. Ensure Uninterrupted Access to Websites and Services
Certain websites or services may block or restrict access to users based on their IP address. If your IP is blacklisted, you could encounter problems like:
- Being unable to access specific websites or applications.
- Being flagged as a malicious user when trying to log into your accounts.
- Getting locked out of important online tools or services due to security concerns.
If you’re running a business or relying on online tools for work, this can be a serious problem. Regularly checking your IP status ensures that you can access websites and services without interruptions, and it gives you the peace of mind that your IP is not being flagged for harmful activities.
3. Prevent Being a Part of a Botnet
Sometimes, IP addresses become blacklisted because they are part of a botnet—a network of infected devices that cybercriminals remotely control. These botnets are often used to send spam, execute DDoS (Distributed Denial of Service) attacks, or spread malware.
If your device is part of a botnet, your IP address can be flagged and blacklisted. Regular IP blacklist checks help identify if your IP has been associated with botnet activity, allowing you to take action before it causes further damage to your reputation or security. To know more about bots and why it uses IP addresses to hide it please check our article.
4. Detect Security Vulnerabilities Early
An IP address getting blacklisted could be an early warning sign that your system has been compromised. If your IP has been blacklisted for sending spam or engaging in malicious activities without your knowledge, it’s a sign that your security may be at risk.
By performing regular IP blacklist checks, you can:
- Detect security breaches or infections early on.
- Take proactive steps to clean your system and remove any malware or unwanted software.
- Ensure that your IP isn’t being used for malicious purposes, which could lead to legal or financial consequences.
5. Stay Ahead of Reputation Damage
A blacklisted IP can severely damage your online reputation. If you’re a business owner, running campaigns, or providing services online, your IP address might be associated with your brand. If your IP is blacklisted, clients and customers might think you’re involved in unethical practices, even if you’re not.
Additionally, if your IP is used to send spam or perform malicious activity, it could tarnish your credibility with both potential and current customers. Regularly checking your IP status helps you stay on top of any issues and fix them quickly before they affect your reputation. Tools like TrustedClicks offer IP reputation monitoring and help track whether your IP is blacklisted on any of the major blacklists. The process of checking and maintaining a clean IP status has never been easier.
How to Perform an IP Blacklist Check
Now that you understand the importance of checking your IP’s status regularly, let’s take a look at how you can perform an IP blacklist check. Fortunately, there are several free tools and services available online that make this process quick and easy.
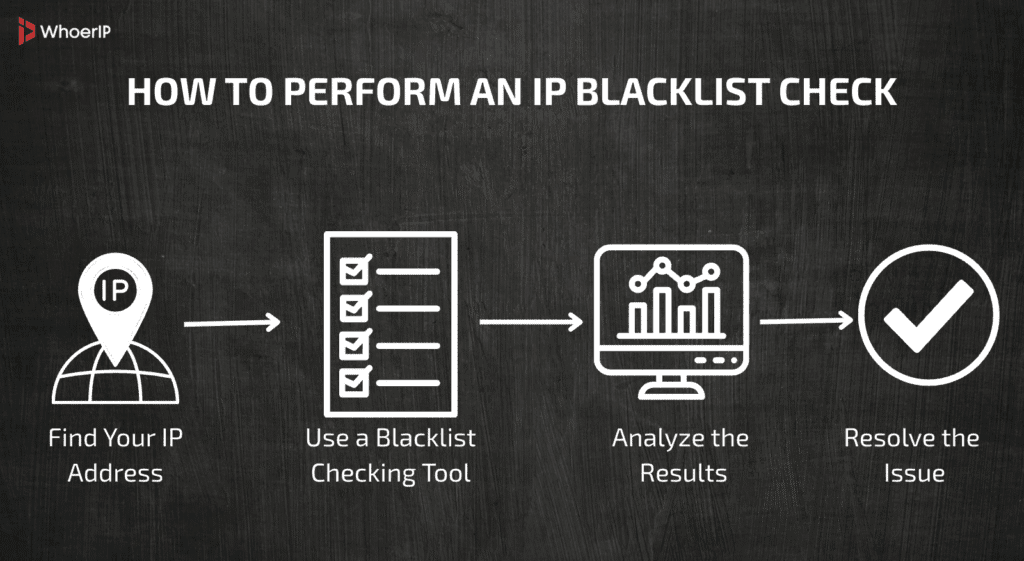
Step 1: Find Your IP Address
Before you can check if your IP is blacklisted, you’ll need to know what your current public IP address is. You can easily find your IP by searching “What is my IP” in Google, or by using a tool like WhoerIP.
Whoer.ip has lots of features and important benefits which we tell you about in the special article.
If you’re using a VPN or proxy, be sure to check the public IP address of your server or VPN endpoint.
Step 2: Use an IP address Blacklist Check Tool
There are many tools available that allow you to check if your IP is on a blacklist. Some popular options include:
- MXToolbox: A widely used tool for checking IP blacklisting across multiple major blacklists.
- Blacklist Check: A tool that checks your IP against a variety of blacklists and shows you where it’s been flagged.
- TrustedClicks: Helps with IP reputation monitoring and tracking whether your IP is blacklisted on any major blacklists.
These tools will scan your IP address against known blacklists and provide a report showing which, if any, blacklists your IP is listed on.
Step 3: Analyze the Results
Once you’ve run the IP blacklist check, carefully review the results. If your IP appears on any blacklists, take immediate action. Some blacklists may provide specific reasons for the listing (e.g., spamming or malware activity), helping you identify the cause of the issue.
Step 4: Resolve the Issue
If you find that your IP is blacklisted, take the necessary steps to resolve the issue. This could involve:
- Cleaning your device: Run a full malware scan to ensure your system is secure.
- Contacting the blacklist provider: Some providers offer removal requests or delisting processes.
- Reviewing your email practices: If the issue is related to email spam, consider improving your email practices or using a dedicated email service provider.
Conclusion: The Importance of Regular IP Blacklist Checks
An IP blacklist check is more than just a good idea—it’s essential for maintaining your online reputation. It ensures uninterrupted access to websites and services and protects your privacy. By performing regular checks, you can spot potential problems early, prevent security breaches, and keep your online presence secure.
Whether you’re looking to protect your personal information or maintain email deliverability, regularly checking your IP status is an effective way to stay on top of your online security.
Frequently Asked Questions
Can your IP be blacklisted?
Anyone's IP can be blacklisted if it's associated with malicious activities such as sending spam, hosting malware, or being part of a botnet. This can lead to issues with email deliverability, website access, and reputation damage.
How to check blacklist IP?
To check if your IP is blacklisted, first find your IP address (e.g., by searching “What is my IP” in Google). Then use blacklist checking tools such as MXToolbox, Blacklist Check, or TrustedClicks to scan your IP against known blacklists.
How long does an IP blacklist last?
The duration of an IP blacklist depends on the blacklist provider. Some blacklists may remove your IP automatically after a certain period, while others may require you to request delisting. It can range from a few days to indefinitely until action is taken.
What to do if you are blacklisted?
If you're blacklisted, you should: 1. Clean your device by running a full malware scan to remove any infections. 2. Contact the blacklist provider to request delisting or removal. 3. Review your email practices to avoid sending spam. 4. Take steps to secure your system to prevent future issues.